本記事は、Shiny Advent Calendar 2018の24日目の記事です。
そして、Shiny100本ノックの第41弾です。
前回、shinyjquiライブラリについて紹介しました。
www.randpy.tokyo
今回は、shinyjquiライブラリの中から、table作成時に便利な関数をいくつか紹介します。
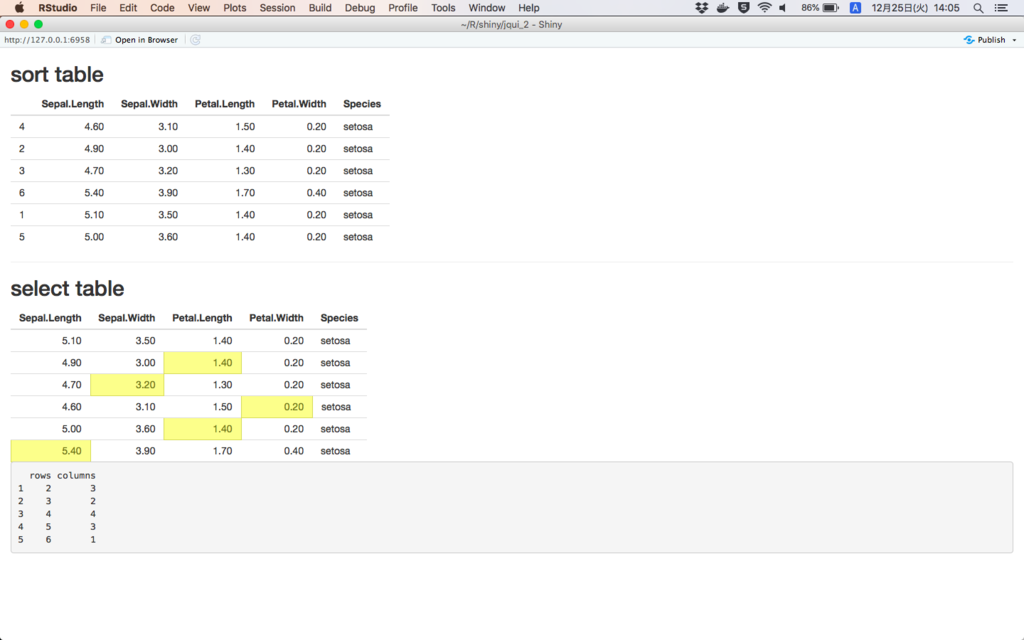
今回作ったアプリ

画面上のテーブルでは、行を選択して自由に順番を変更できるようなテーブルになってます。画面下のテーブルでは、表内の値を選択できるようなテーブルになってます。
今回使ったコード
app.R
library(shiny)
library(shinyjqui)

ui <- fluidPage(
  titlePanel("sort table"),
  sortableTableOutput("sort_table"),
  hr(),
  titlePanel("select table"),
  selectableTableOutput("select_table", selection_mode = 'cell'),
  verbatimTextOutput("selected_cell")
)

server <- function(input, output) {
  output$sort_table <- renderTable(head(iris), rownames = TRUE)
  output$select_table <- renderTable(head(iris))
  output$selected_cell <- renderPrint({input$select_table_selected})
}

shinyApp(ui, server)
まず、ソート可能なテーブル作成にはsortableTableOutput()を使用するだけです。
選択可能なテーブル作成には、selectableTableOutput()を使用します。
オプションとして、selection_mode = 'cell'とすることで、セル単位で選択することが可能になります。選択された行、列番号の取得には、selectableTableOutput(id)で指定したidに_selectedをつけることで、取得できます。
今回の場合は、select_tableをid名としているので、select_table_selectedとすることでデータの参照が可能になります。